Avalanche is an open-source platform for launching and developing decentralized apps (DApps) and enterprise blockchain deployments in a highly scalable and interoperable environment.
Also dubbed Layer 1 Ethereum killer because of the cheaper and faster transaction times, Avalanche is swiftly gaining popularity and has become a popular Ethereum alternative. The blockchain tries to address the security, centralization, and most crucially, scalability issues that have plagued previous blockchains.
It claims to be a more cost-effective (lower gas fees), faster, and safer blockchain than Ethereum. The consensus process that it uses is Proof of Stake. With transaction times as low as 3 seconds, it can process over 4500 transactions per second. The capabilities of Avalanche pique the interest of most DeFi users.
MetaMask is a cryptocurrency wallet as well as a gateway to blockchain-based applications. It’s an important part of the DeFi ecosystem’s user experience and interface. Primarily, MetaMask is used for Ethereum, but it also supports and can be used with a wide range of other blockchains that use the Ethereum Virtual Machine (EVM).
In this article, we’ll discuss the process of connecting to the Avalanche blockchain and explore its rapidly growing, ultra-fast DeFi environment by adding it to MetaMask. We’ll go over how to transmit AVAX coins to your MetaMask Avalanche address as well. To interact with the Avalanche ecosystem, you’ll require AVAX tokens as fees. This is comparable to the use of ETH and BNB as fees on their respective blockchains.
But before we discuss that, let’s take a look at the Avalanche ecosystem!
The Avalanche Ecosystem
Unlike other decentralized finance blockchains, Avalanche is subdivided into three independent blockchains. These are:
- Exchange chain (X-Chain)
- Platform chain (P-Chain)
- Contract chain (C-Chain)
The X Chain serves as a marketplace for real-world resources and digital smart assets to be created and traded.
The P Chain is a metadata blockchain that keeps track of custom chains, coordinates validators, and allows for the establishment of new subnets.
Avalanche’s Snowman consensus mechanism powers the C Chain, which is an instance of the Ethereum Virtual Machine. C-Chain RPC can perform anything a conventional Ethereum client can do using Ethereum’s standard RPC calls.
Smart contracts are supported by the C Chain, which also includes ERC20, NFT, and DApps due to its ability to execute EVM contracts. All of Ethereum’s features, paired with the advantages of Avalanche, significantly increase DApp performance and user experience.
MetaMask can only connect to the Avalanche network’s C Chain since only C Chain is EVM compliant.
You can also check out this beginner’s guide to the Avalanche Network to learn more about it.
Alright! Now, Let’s see how to link MetaMask to the Avalanche network.
How to Link MetaMask to the Avalanche Network (AVAX)?
It’s fairly easy to connect MetaMask to Avalanche. Those who have used MetaMask on Binance Smart Chain will see that the approach is extremely similar. All you have to do is enter the required information into a custom RPC and you’re good. This is all that it takes for MetaMask to connect to the Avalanche blockchain and communicate with it. Everything can be set up and operated on in a matter of minutes.
So, let’s take a look at the steps involved, shall we?
Step 1: Install MetaMask
If you already have a MetaMask wallet, skip to the next steps to learn how to link it to the Avalanche network and add AVAX tokens to your wallet. If you don’t have a MetaMask wallet, follow these instructions to get one.
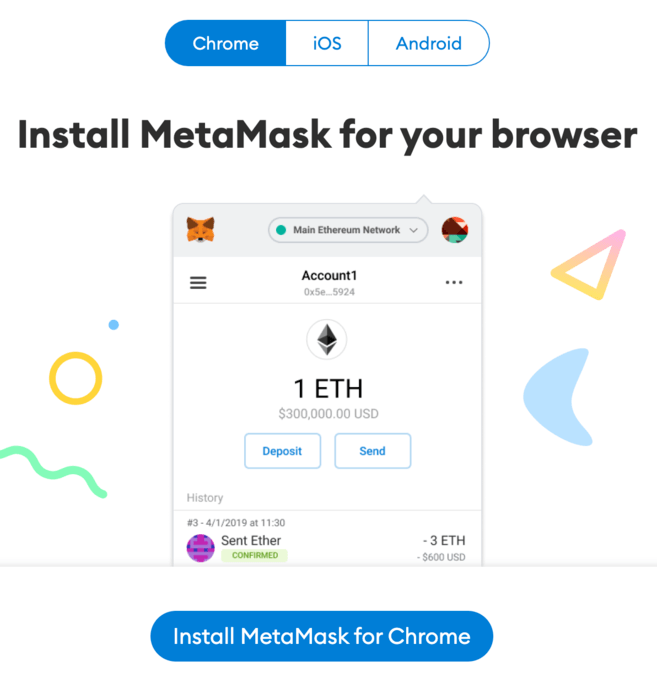
MetaMask comes in the form of a browser extension and a mobile wallet. This link will take you to the official website download page where you can get it. It is supported on Google Chrome, Microsoft Edge, Firefox, and Brave. Also, It is available for both Android and iOS mobile devices.
MetaMask is a browser plugin that you may access through your browser’s settings once you’ve downloaded it. To see the available extensions in Chrome, type chrome://extensions/ in the address bar and you’ll be led to the extensions section.
Step 2: Setting up your MetaMask wallet
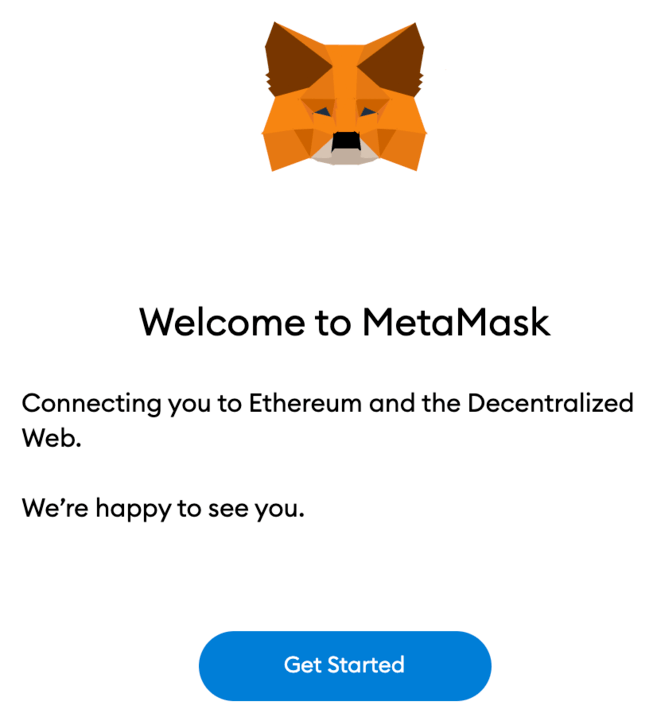
After installation, the MetaMask fox should appear on the welcome screen. Now, I have been using MetaMask for a while now but I still can’t get over how cute the fox is. As John Keates said in Endymion, ”A thing of beauty is a joy forever”. In any case, let’s get back to the installation process. On this screen, you need to click on the [Get Started] button.
How to Create a MetaMask Wallet
To create a MetaMask wallet, click on the [Create a Wallet] button. If you instead want to import a previous wallet using your seed phrase, click on the [Import wallet] button.

If you wish to help MetaMask improve the extension, you’ll be asked if you want to share anonymous usage statistics with them. This will have no effect on your MetaMask usage experience, regardless of whatever option you select. That said, the developers did put in quite a lot of effort to make the extension. So, giving them some anonymous usage statistics seems like a good thing to do. But it’s your call.

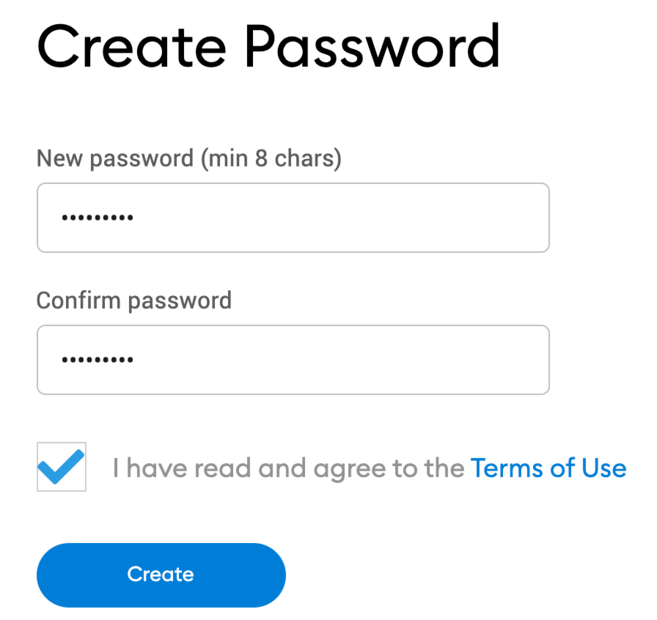
Now, you need to create a strong password for your wallet. The rules for creating passwords remain more or less the same out here. Ideally, you should use a password generator for making passwords but let’s face it, we’re all going to for a simple “name-age” password.
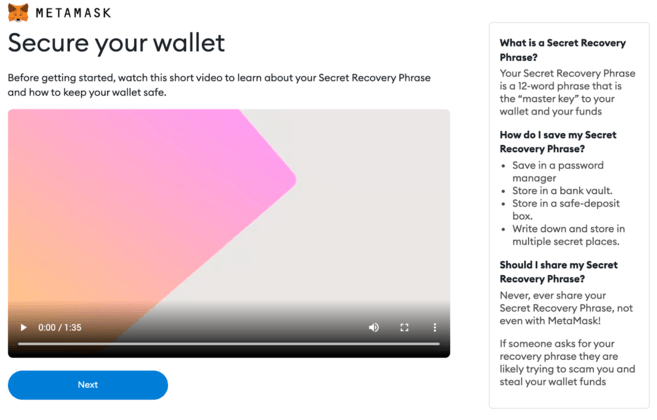
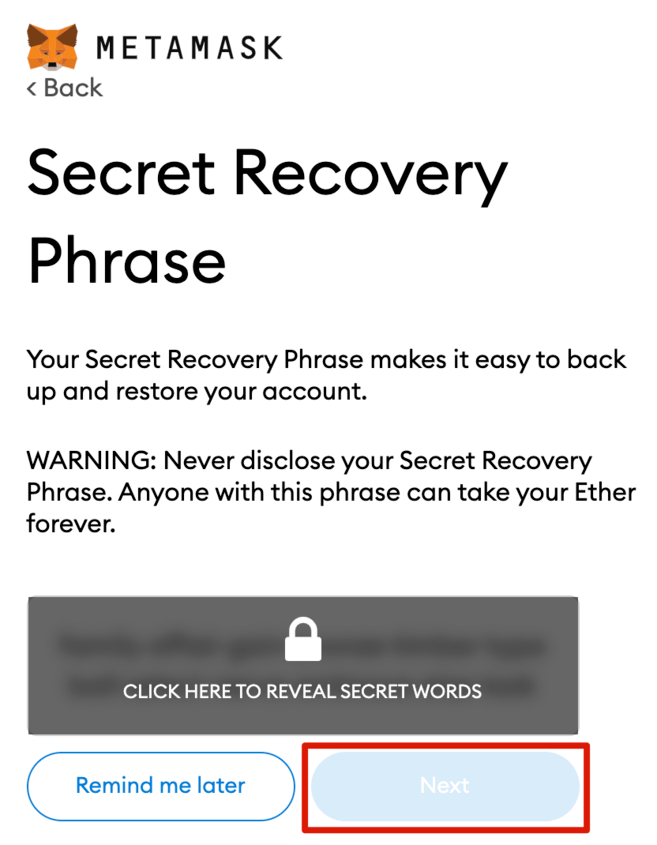
Before you begin, make a backup of your wallet’s seed phrase. If you lose access to your device or forget your password, you can use the seed phrase to recover your wallet. Make sure to watch the video and read the information if you’re not familiar with how a crypto wallet works. Click on the [Next] button when you’re ready.
After that, you’ll get your seed phrase. To reveal the words, click on them and then write them down in the correct order. You should save the seed phrase in some offline modes and never share it with anyone. This includes writing them on separate sheets of paper and stowing those pieces of paper in different safe locations. By doing this, you would ensure that even if one of the copies ends up getting destroyed, you still have the others to rely on. The trick is to not forget where the copies are!
To confirm that you’ve backed up the seed phrase correctly, choose the words at the bottom in the correct order. To continue, click on the [Confirm] button.
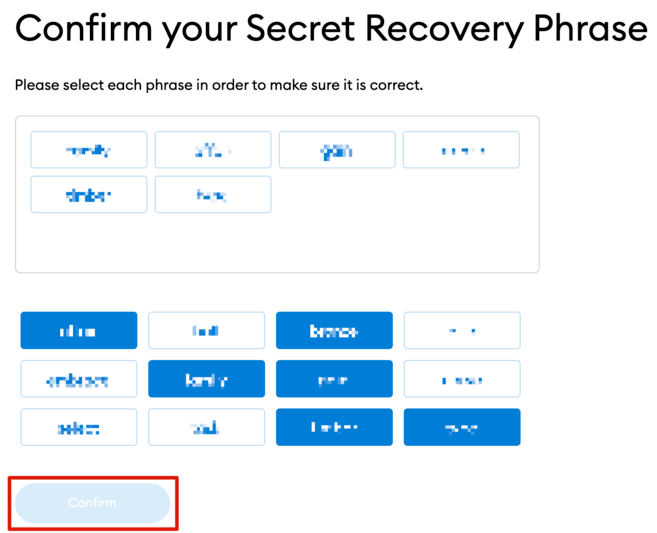
You may now use your MetaMask wallet. To go to your wallet, click on the [All Done] button.

Step 3: Adding Avalanche Network
The next step is to connect your MetaMask wallet to the Avalanche network. The first thing to do is open a new browser tab and launch the MetaMask wallet. Simply click the MetaMask logo in the upper right extension box to do so.
Select “Expand view” from the three dots in the top-right corner.
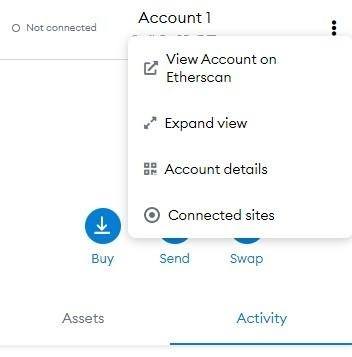
This is how your wallet will appear on a new browser tab.

MetaMask connects to the Ethereum mainnet by default. You must first create a custom RPC network before connecting it to other networks. To create a new network, simply go to the top-right circular logo and select Settings, then Networks.
Select the “Add a network” option once you’ve arrived at this screen.
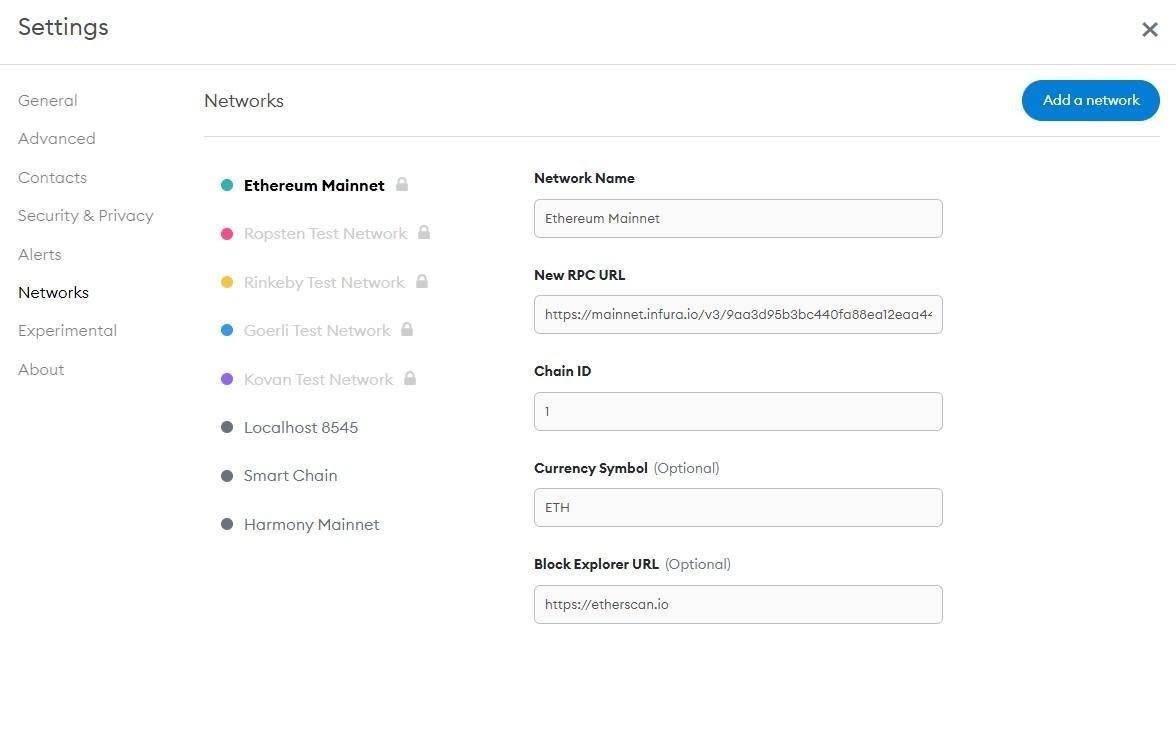
To enter the essential technical information for the Avalanche network, go to Avalanche’s official website, where you’ll find everything you need.
To make things simpler for you, I have added the information required for adding the Avalanche network below:
- Network Name: Avalanche Network
- New RPC URL: https://api.AVAX.network/ext/bc/C/rpc
- ChainID: 0xa86a or 43114
- Currency Symbol: AVAX
- Block Explorer URL: https://snowtrace.io/

Check that all the information, such as Network Name, New RPC, ChainID, Symbol, and Block Explorer, is correct. To add the Avalanche network to MetaMask, click Save after you’ve finished.
Note: You can put 43114 or 0xa86a in the ChainID field. The hexadecimal version of its decimal form: 43114 is 0xa86a. MetaMask, by default, displays the Chain ID in decimal form.
Again, all of the details I’ve mentioned above are also listed in the Avalanche developer documentation. You can access it using this link.
We are connecting to the Avalanche mainnet C-Chain in this tutorial. After you’ve entered the Avalanche mainnet C-Chain network details, go to your MetaMask extension’s networks drop-down menu and select the Avalanche network.
If MetaMask is unable to connect to the network, it will display an error message. When that happens, double-check the network information you’ve entered and confirm if it is right. If it isn’t, make the required changes and repeat.
That is all there is to it. You’re all set now. Your MetaMask has now been successfully connected to the AVAX network mainnet.
Now to engage with the DApps on the Avalanche blockchain, you’ll require AVAX coins. As the native token of the Avalanche network, AVAX works pretty much the same way native tokens of the Ethereum and Binance Smart Chain do.
Step 4(a): Sending AVAX tokens to MetaMask from Binance
If you are using Binance, first log in to your Binance account and go to [Wallet Overview] and Click [Withdraw].

Now, Select [AVAX].

Next, Go to your MetaMask wallet and copy the address.

Return to Binance and paste the MetaMask address into the [Address] section there. Then choose a network and enter the amount to be transferred. If you don’t choose a compatible network, you may lose your assets. To continue, click [Withdraw].

Before you proceed, make sure you’re aware of the potential hazards involved with asset withdrawals. And before clicking [Confirm], read the box and check it.
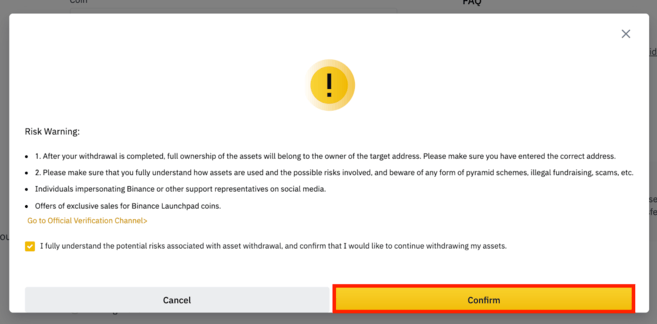
Your withdrawal information will appear in a pop-up window. Before proceeding, you should double-check the details.

After that, you’ll be asked to confirm your transfer using two-factor authentication devices. Your AVAX will be transferred to your MetaMask wallet once you click [Submit].

That’s all! You have added AVAX tokens to your MetaMask C-Chain address. Similarly, if you want to deposit AVAX from MetaMask to Binance or another exchange, you can use the C-Chain address.
If you’re transacting to or from MetaMask, make sure you don’t send it to a P-Chain or X-Chain address. For transfers, only use the C-Chain address.
Alright! But what if the C-Chain protocol isn’t supported?
Certain services, for example, do not yet support deposits or withdrawals to C-Chain addresses. In this case, you must employ the AVAX wallet cross-chain feature. And what’s that? We’ll discuss that in a bit. But first, let’s take a look at how you would send AVAX to MetaMask if the platform you’re using is not Binance.
Step 4(b): Sending AVAX to MetaMask using other platforms
Centralized exchanges (CEXes) and decentralized exchanges (DEXes) are both good places to get Avalanche tokens. Kucoin, Bitfinex, and Huobi Global are just a few of the exchanges on which it is traded.
You can send Avalanche AVAX tokens to your MetaMask wallet once you get them. But hold on! Now comes the tough part: transferring AVAX tokens into your MetaMask wallet.
Note: AVAX tokens are used to pay for all transactions on the Avalanche blockchain. Much like you pay the gas fee on Ethereum with ETH, you would need to pay in AVAX tokens for the gas. Your MetaMask wallet address remains the same for both Avalanche and Ethereum mainnets. However, you won’t be able to transfer ARC-20 tokens to the Avalanche network right away.
As previously stated, Avalanche is made up of various chains, including the X Chain (Exchange), P Chain (Platform), and C Chain. The crucial thing to remember is that because your MetaMask is connected to the Avalanche Mainnet C-Chain, MetaMask can only communicate with the C-Chain address. As a result, you must exercise extreme caution when transferring tokens (ARC20) to and from the Avalanche network.
The method of funding the MetaMask AVAX C-Chain address is determined by the source of the tokens. Certain exchanges, including Binance and Kucoin, allow you to withdraw and deposit straight to the AVAX C-Chain address.
How to use Cross Chain swaps – AVAX
First, create a new Avalanche wallet on their official website. Make a note of the mnemonic phrase, as it will be your only backup to the AVAX wallet.
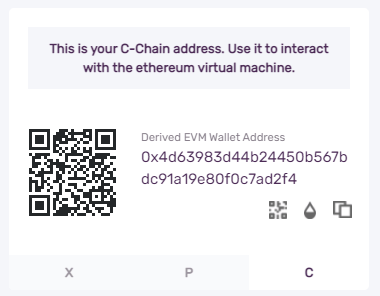
If you have AVAX tokens in your MetaMask wallet and wish to transmit them to your Avalanche wallet, copy the C-Chain address from your Avalanche wallet and send it from MetaMask. You’re transmitting AVAX coins from MetaMask to the C chain address of your Avalanche wallet.
For example, let’s assume you want to send funds to your MetaMask Avalanche, but the exchange from which you’re withdrawing does not currently allow C-Chain addresses. In this situation, you need to send the coins to the X Chain address of the AVAX wallet, swap tokens from X-Chain to C-Chain utilizing the cross-chain capability, and then transmit from your C-Chain AVAX wallet to your MetaMask C-Chain address.
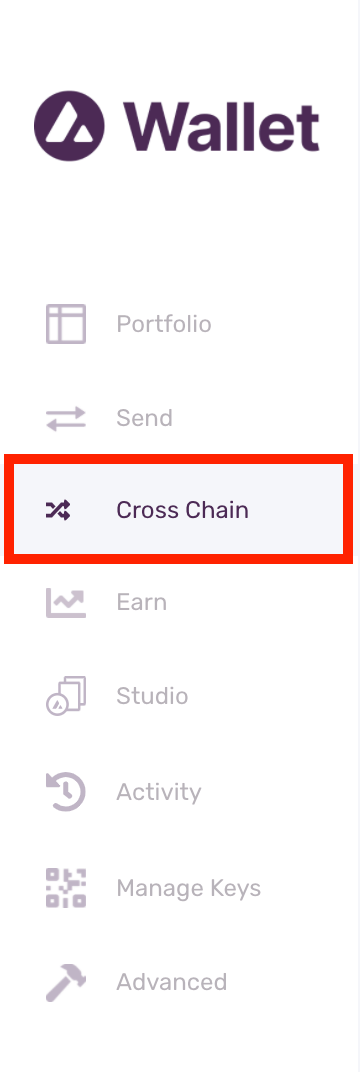
To perform a cross-chain transfer, follow these steps:
On the left menu bar, select [Cross Chain].
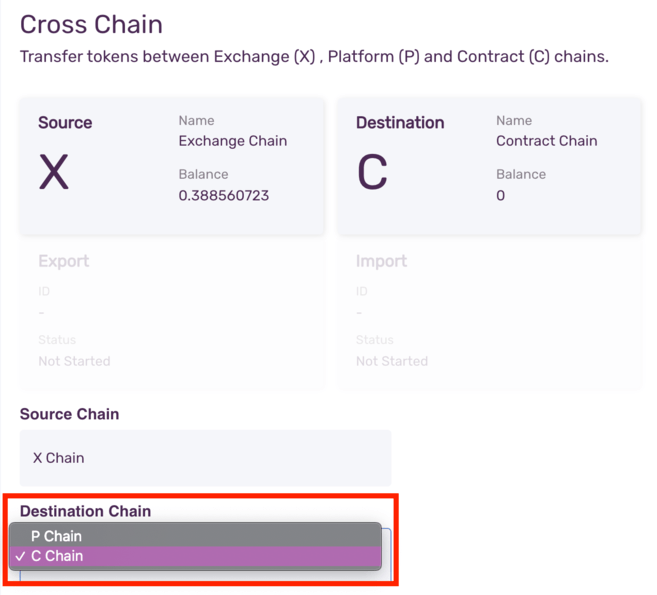
Then select the source chain where you have the amount and the destination chain from which you want to convert. Then enter the transfer amount and press the confirm button. You should be aware that there will be a small transaction fee.
For example, if you have coins in your AVAX wallet X-Chain, select X-Chain as the source chain. Select the C-Chain as the destination chain, then enter the amount and complete the transaction. The coins will be moved from the X-Chain to the C-Chain.
You can now send coins or tokens from your Avalanche wallet’s C-Chain address to your MetaMask’s C-Chain address.
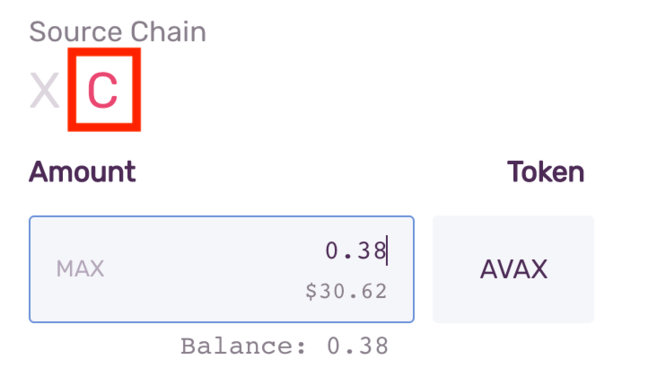
Now, from the left menu bar, select [Send].

Choose [C] for the source chain. Enter the amount to be sent to MetaMask.
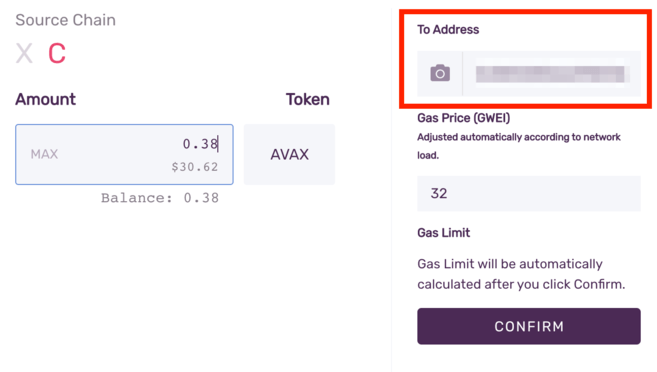
Go to your MetaMask wallet and copy the address there.

Return to your Avalanche wallet and paste the MetaMask wallet address into the [To Address] field. To transfer, check the gas fee and click [Confirm]. The AVAX will appear in your MetaMask wallet as soon as the transaction is confirmed.
Before you go…
That’s it! We hope you find this guide useful. When experimenting with different blockchains, especially when putting assets into them, exercise extreme caution. Always start with small amounts to ensure everything is working properly and that you haven’t missed anything. Only then should you proceed with large transfers. And even then, it is good to exercise caution. Even the simplest mistakes could cause you to part with hard-earned money. So, please be careful while using the wallet.
Although MetaMask was created for Ethereum, it is now being used on a variety of blockchain networks, including Avalanche, Binance Smart Chain, Polygon, and others. You’ll be able to explore the numerous DeFi platforms and DApps of each blockchain ecosystem, such as PancakeSwap, Uniswap, SushiSwap, and OpenSea if you learn how to add each network manually. So, it’s beneficial to know how to connect networks such as Avalanche to your wallet.
Sending AVAX to your MetaMask Avalanche network and sending coins out of the MetaMask Avalanche network can be quite confusing at first. But you’ll get used to it in no time.
Meta-description: Sending AVAX in and out of your MetaMask Avalanche network can be quite confusing at first. Here’s a step-by-step guide to connecting Metamask with Avalanche.
Personal Note From MEXC Team
Check out our MEXC trading page and find out what we have to offer! You can learn more about crypto industry news. There are also a ton of interesting articles to get you up to speed with the crypto world. Lastly, join our MEXC Creators project and share your opinion about everything crypto! Happy trading!
Join MEXC and Start Trading Today!


